

So in the never-ending need to go faster with processing images, I purchased a new computer. The Dell XPS 8950 to be exact. I was going to build a PC but after pricing it all out Dell was the cheaper route to go and it included one year of pro support and Windows 11 Pro as I bought the Dell Business version of the system. Just so you know I bought the barest bone system they had and included the 700W power supply and the fastest CPU they offered the 12th Gen Intel(R) Core(TM) i9-12900K 3.20 GHz, 8GB of ram, and a 512GB SSD. I then went to Amazon and purchased some Crucial 2x32GB of DDR5 RAM and a 2TB (Windows) and a 1TB (Linux) Samsung 980 Pro M.2 SSD for some stupid fast disk speed. I may eventually max out the ram to 128GB but as it stands I have had no issues with processing in PixInsight at all
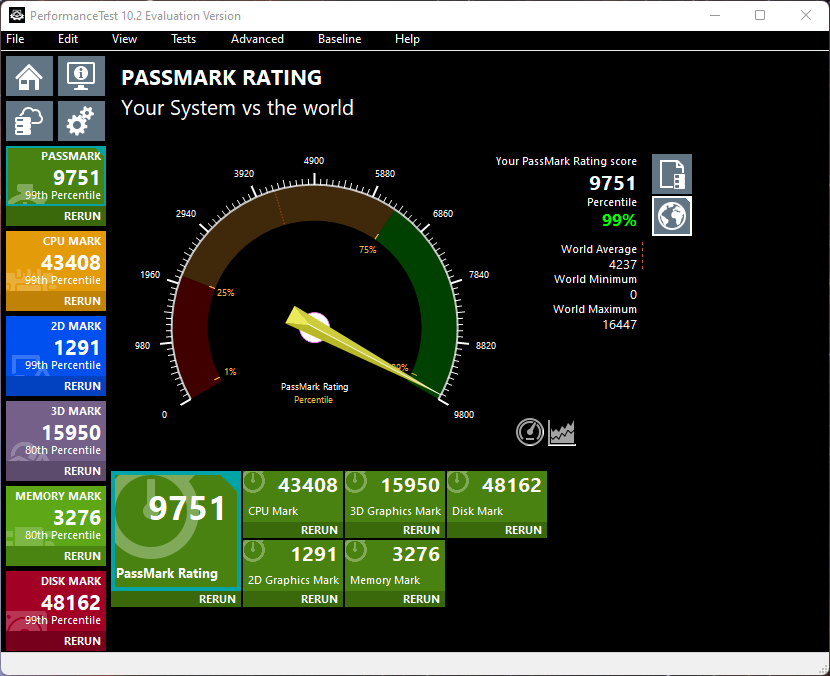
After getting all those bells and whistles I purchased the best video card I have ever purchased in my life and I ended up rolling with the NVIDIA RTX A2000 from B&H as it’s geared towards Data Science and AI and not gaming. In terms of video cards, this card is considered entry-level for the RTX line but I couldn’t justify spending over 1K for the A4000, also the A2000 doesn’t require any extra power to run.
Anyways now that I have a screaming PixInsight Rig I wanted to take advantage of using the new A2000 and below is a great article on setting up some tweaks to speed up PixInsight for StarNet++ by DarkArchon as long as you have an NVIDIA CUDA video card.
Now his guide is solid however it’s a little outdated as NVIDIA keeps updating its tools. Here are some links for the software I used at the time of writing this up. NOTE** In terms of your video card as long as it has CUDA support you should be good however since I am using the Workstation RTX video card over a Gaming RTX I am not sure if you should download the Game Ready Driver or Studio Driver so you will need to test that out.
NVIDIA Updated Drivers
https://www.nvidia.com/Download/index.aspx?lang=en-us
READ*** Before driving too fast to the finish line make sure you are following the Tensorflow Matrix for the right version of TensorFlow, CUDA, and cuDNN or you will pull your hair out.
https://www.tensorflow.org/install/source#gpu
TensorFlow 2.9.0
https://github.com/tensorflow/tensorflow/releases
You will want to find out the newest version of TensorFlow software and replace the 2.9.0 in the URL below with the current version based on the matrix
https://storage.googleapis.com/tensorflow/libtensorflow/libtensorflow-gpu-windows-x86_64-2.9.0.zip
NVIDIA CUDA Archive 11.2
https://developer.nvidia.com/cuda-toolkit-archive
cuDNN Archive 8.1 for CUDA 11.2 – I needed to sign up for a free developer account but the link may just work
https://developer.nvidia.com/rdp/cudnn-download
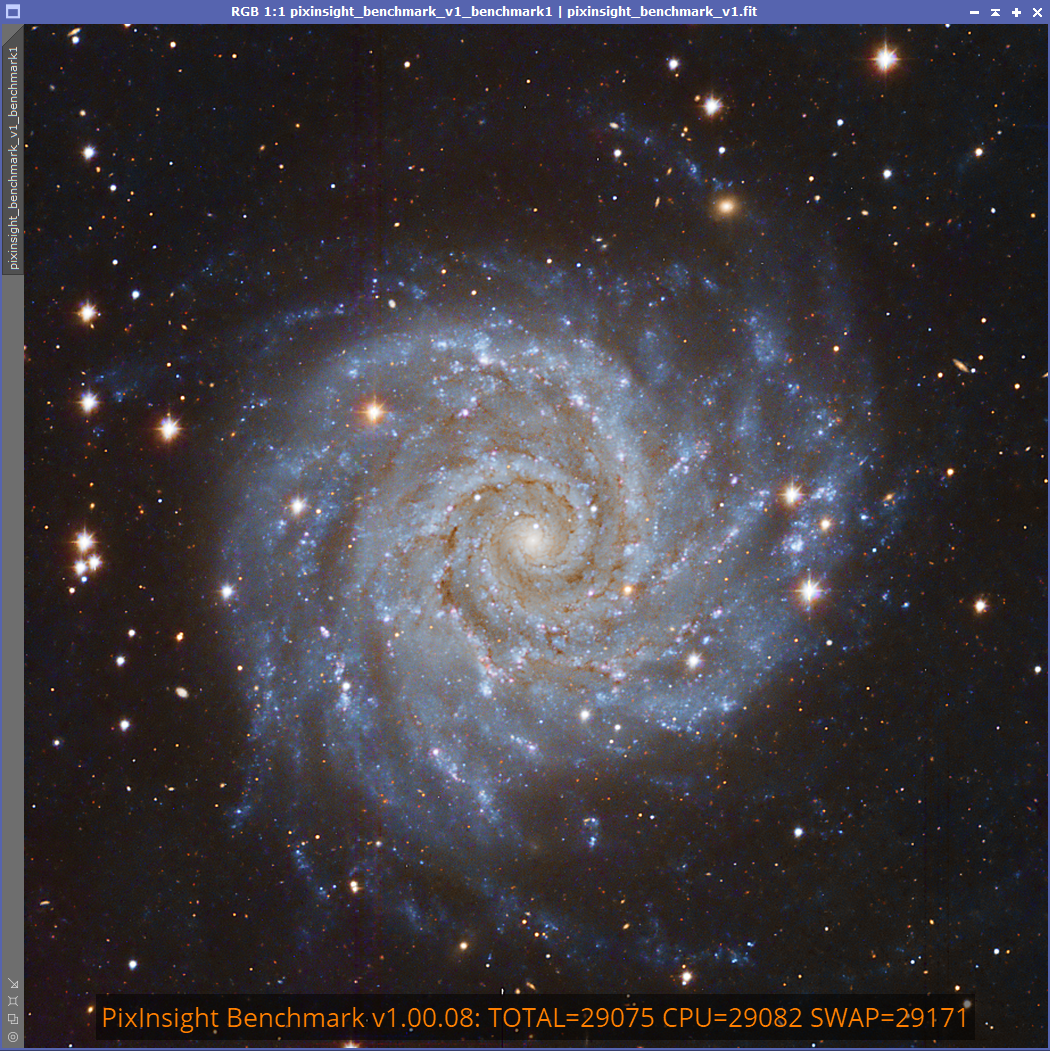
So before the setup of the CUDA features, it took me 1m 43s 40ms to create a starless image of M8

Once I installed all the files per DarkArchon’s tutorial and the updated matrix l I rocked it out in 53.314s!

Till next time…