So my Astro Rig is currently offline for the time being as I sold off a bunch of my gear and have a lot more coming in! There will be YouTube videos and website posts to follow. So while I have been offline I wanted to get rid of the secondary Wi-Fi router I had set up in my house which was only working so so and I decided to buy a reasonably priced Wi-Fi Adapter I could mount to my Astro Rig.
The one issue with the ASIAir Pro is while it’s an amazing little device the onboard Wi-Fi is trash panda as it doesn’t have decent reach. Even though the secondary WiFi router I had set up was in our back bedroom and was 2.4/5Ghz and was maybe 40 feet away it just had so so connectivity. So in comes some new toys
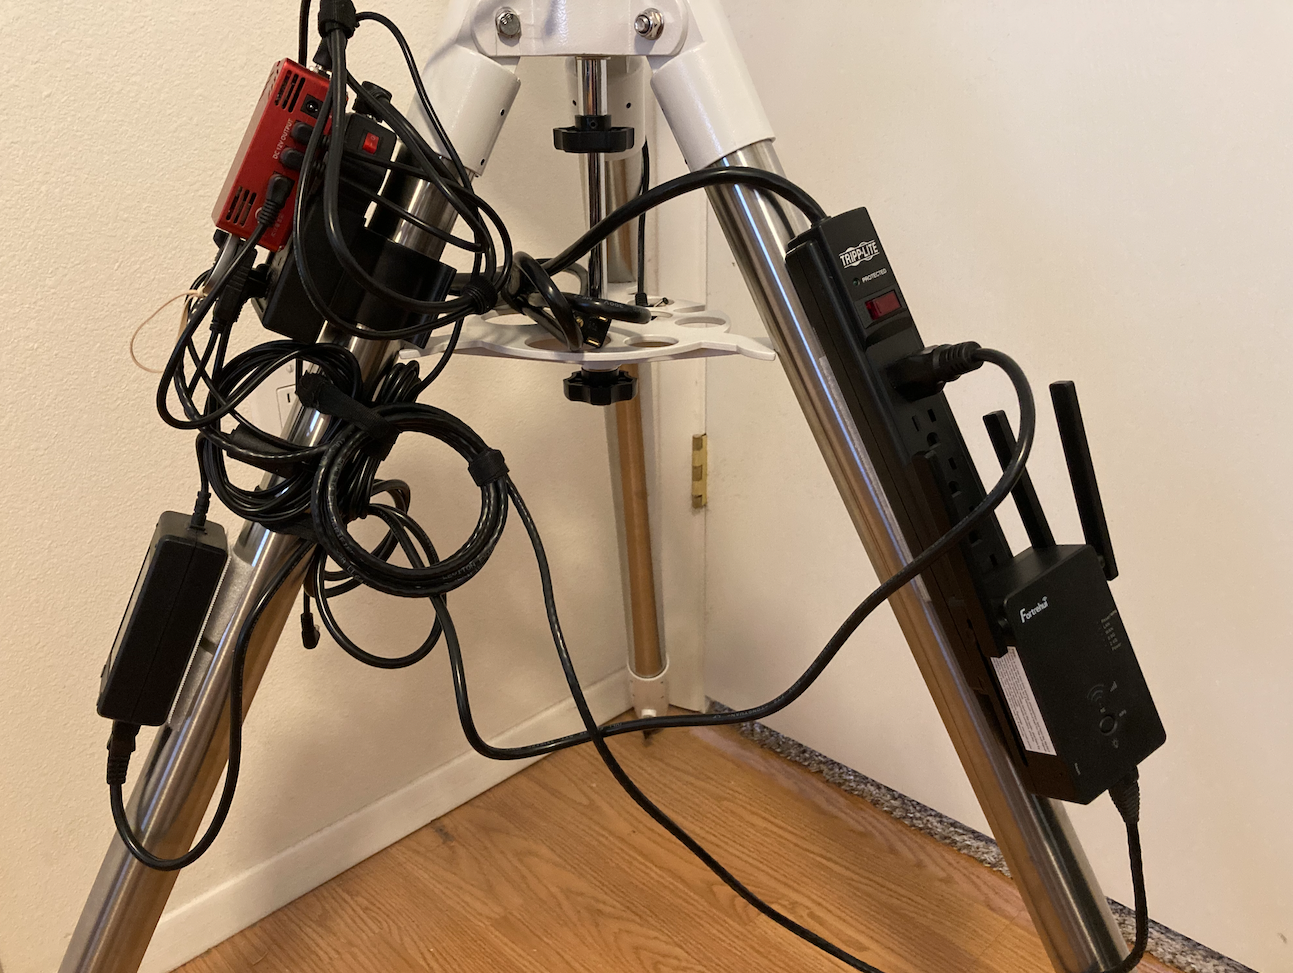
All set up on my Rig it works amazing and also gives me $20,000 of insurance in the event something bad happens to my equipment. Because let’s face it Astrophotography is not cheap. So with the new Tripp Lite Surge protector which is connected to the mount using heavy-duty velcro all is working perfectly now for WiFi extending!
Now how does this work? Well, there are two ways to do it. One is connected to your home network called “Backyard Setup” and if you scroll down there is another one called “Dark Sky Park Setup” and at the very end, I leave some “Final Notes” and some information about increasing the security of your ASIAir Pro by changing the default WiFi password at the end. So let’s get started.
Backyard Setup
- Turn on the WiFi Extender (leave the ASIAIR off) and press the WPS button on your WiFi extender and the Reset/WPS light will blink very fast and then press the WPS button on your router and the two should connect.
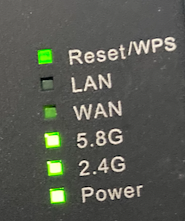
- Once connected the WiFi Extender will have only the 5.8G and 2.4G and Power lights when connected to your home WiFi. If you check your Wireless setting on your phone or tablet you should see your home network. Mine is called CasaDeKayla which is named after our little pooch and then you will see your WiFiNetworkName-2G-EXT and WiFiNetworkName-5G-EXT. Here is an example of mine
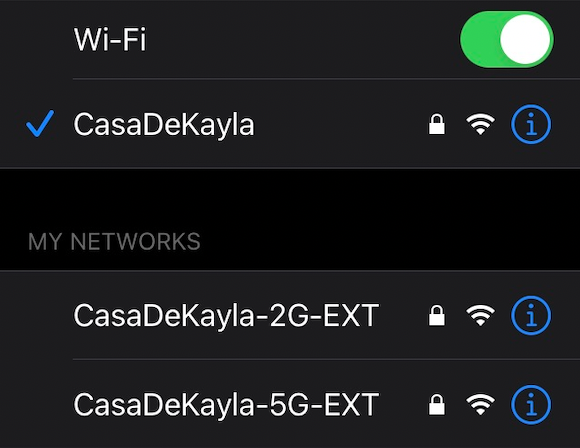
- At this point your WiFi Extender is connected using our home network. You can also connect to the networks as well using your normal password if you need to for some reason on the 2G-EXT or 5G-EXT
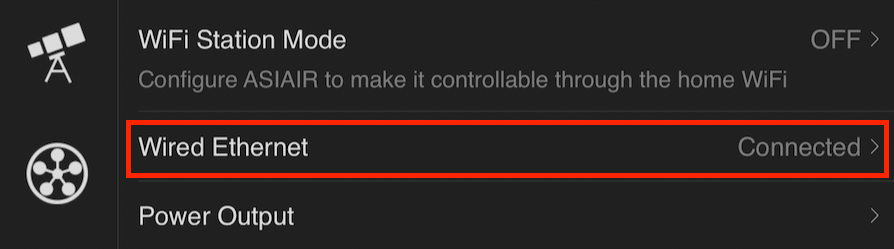
- Now at this point we need to make sure you have the network cable connected to the LAN port in the WiFi Extender and plug it into the Network port of the ASIAir Pro and then turn on the ASIAir Pro. Once the ASIAir Pro beeps you should be able to launch the AISAir Application and it will connect you to the mount. If you check the settings by pressing on the WiFi icon in the ASIAir application it will show you are now connected through the Wired option
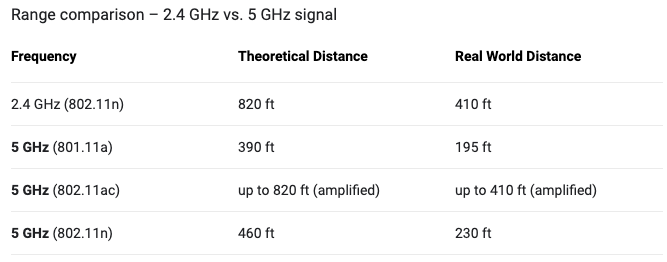
- At this point we are now able to setup in the backyard and use our ASIAir Pro. Just a note here is you will always want to power on the WiFi Extender first and make sure it’s connected and then turn on the ASIAir pro. The technical mumbo jumbo is that once the WiFi Extender connects to your network it is able to hand off an IP address through DHCP from your main router through the WiFi Extender LAN port to the ASIAir. So when you boot the ASIAir Pro it gets an IP on your home network so you will be able to reach the ASIAir on your network as long as the WiFi Extender can connect to the main router. Based on how far away from the house your WiFi connects it’s possible you could get as far as 410 ft away from the house. I just wouldn’t bet on these numbers and expect 50-75 foot loss based on your wall density and where your home router is located.
Dark Sky Park Setup
So you have a wonderful dark sky park you want to go to? Well lucky you! Of course, I can’t complain as my backyard is Bortles Class 3/4. Anyways you can also use this setup so you can extend at the dark sky park as well on either 5.8Ghz or 2.8Ghz depending on how far away you are from your Astro Rig just look at the Range comparison map above to get a good basis.
To start you will need a paper clip or the included metal pin to reset your device.
- Unplug the network cable from the ASIAir and WiFi Extender
- Power on the ASI Air and the WiFi Extender
- Use the pin or a paper clip and press and hold the reset on the left side of the unit for 8 seconds and the WiFi Extender should reboot. Once it’s rebooted check for Wifi network and you should see the following networks
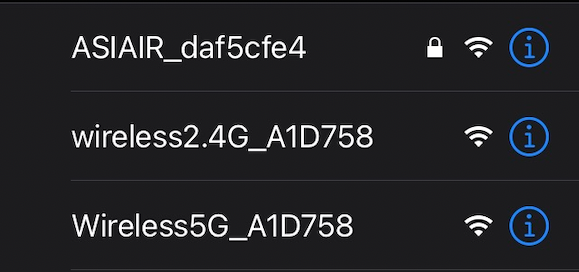
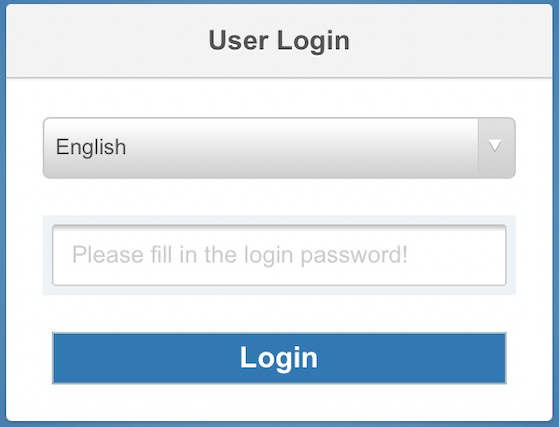
- Connect to either the wireless2.4g or wireless5g once connected your browser should automatically launch you will be prompted with the following web page. The passwords is admin all lowercase
- Now that your logged in choose WISP MODE
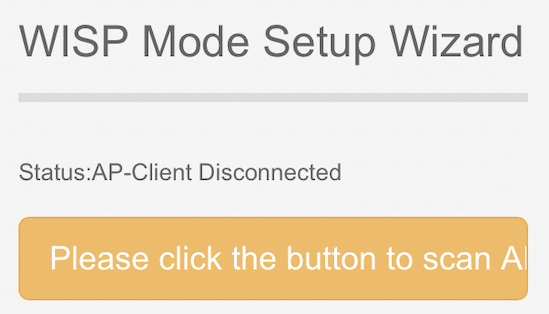
- Now press on the scan button and it will scan local networks near you
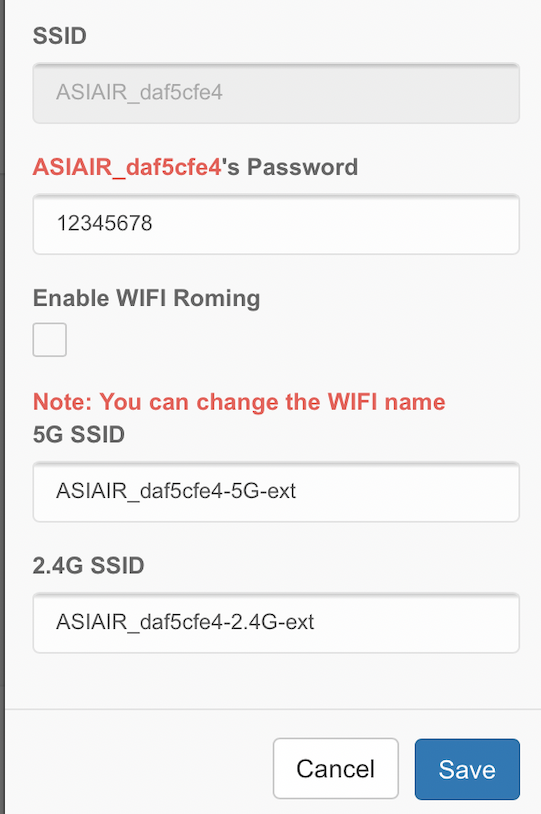
- It should find the ASIAir network, now simply press on the it and it will prompt you for the default password and let you rename the networks if you so choose. Once you type in the password simple press on Save

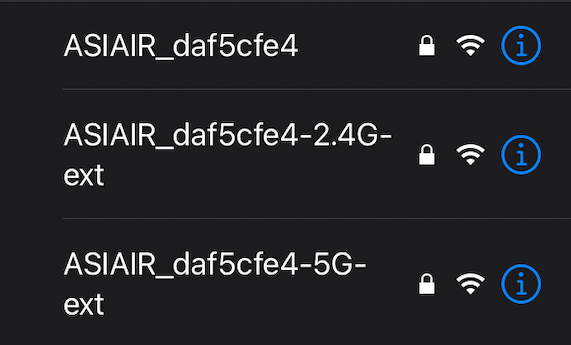
- Wait a moment as the WiFi Extender will reboot and when it comes back up you will see the new networks. Connect to the network that makes more sense depending on how far away from the mount you are I chose the ASIAIR-5G-ext
Once you are connected you can now launch the ASIAir application and you should be connected and should be able to control the mount
Final Notes
I really enjoy this setup as it’s easy to use and even easier with the ASIAir Pro. I have to hand it to ZWO for sure, however, I am not a huge fan of the lack of security with the ASIAir WiFi Network password being 12345678. Since by day I am a Network System Administrator and at night an owner of a software company, security is always in my purview for everything I do. Since by default ZWO doesn’t let you change this password you can manipulate it if you have a Linux computer or even a bootable USB drive of Linux. I have a walk-through I wrote up on Cloudy Nights on how to change this password using Ubuntu.
https://www.cloudynights.com/topic/755167-development-asi-air-pro-driver-injection/?p=10878368
Till next time…