Intro
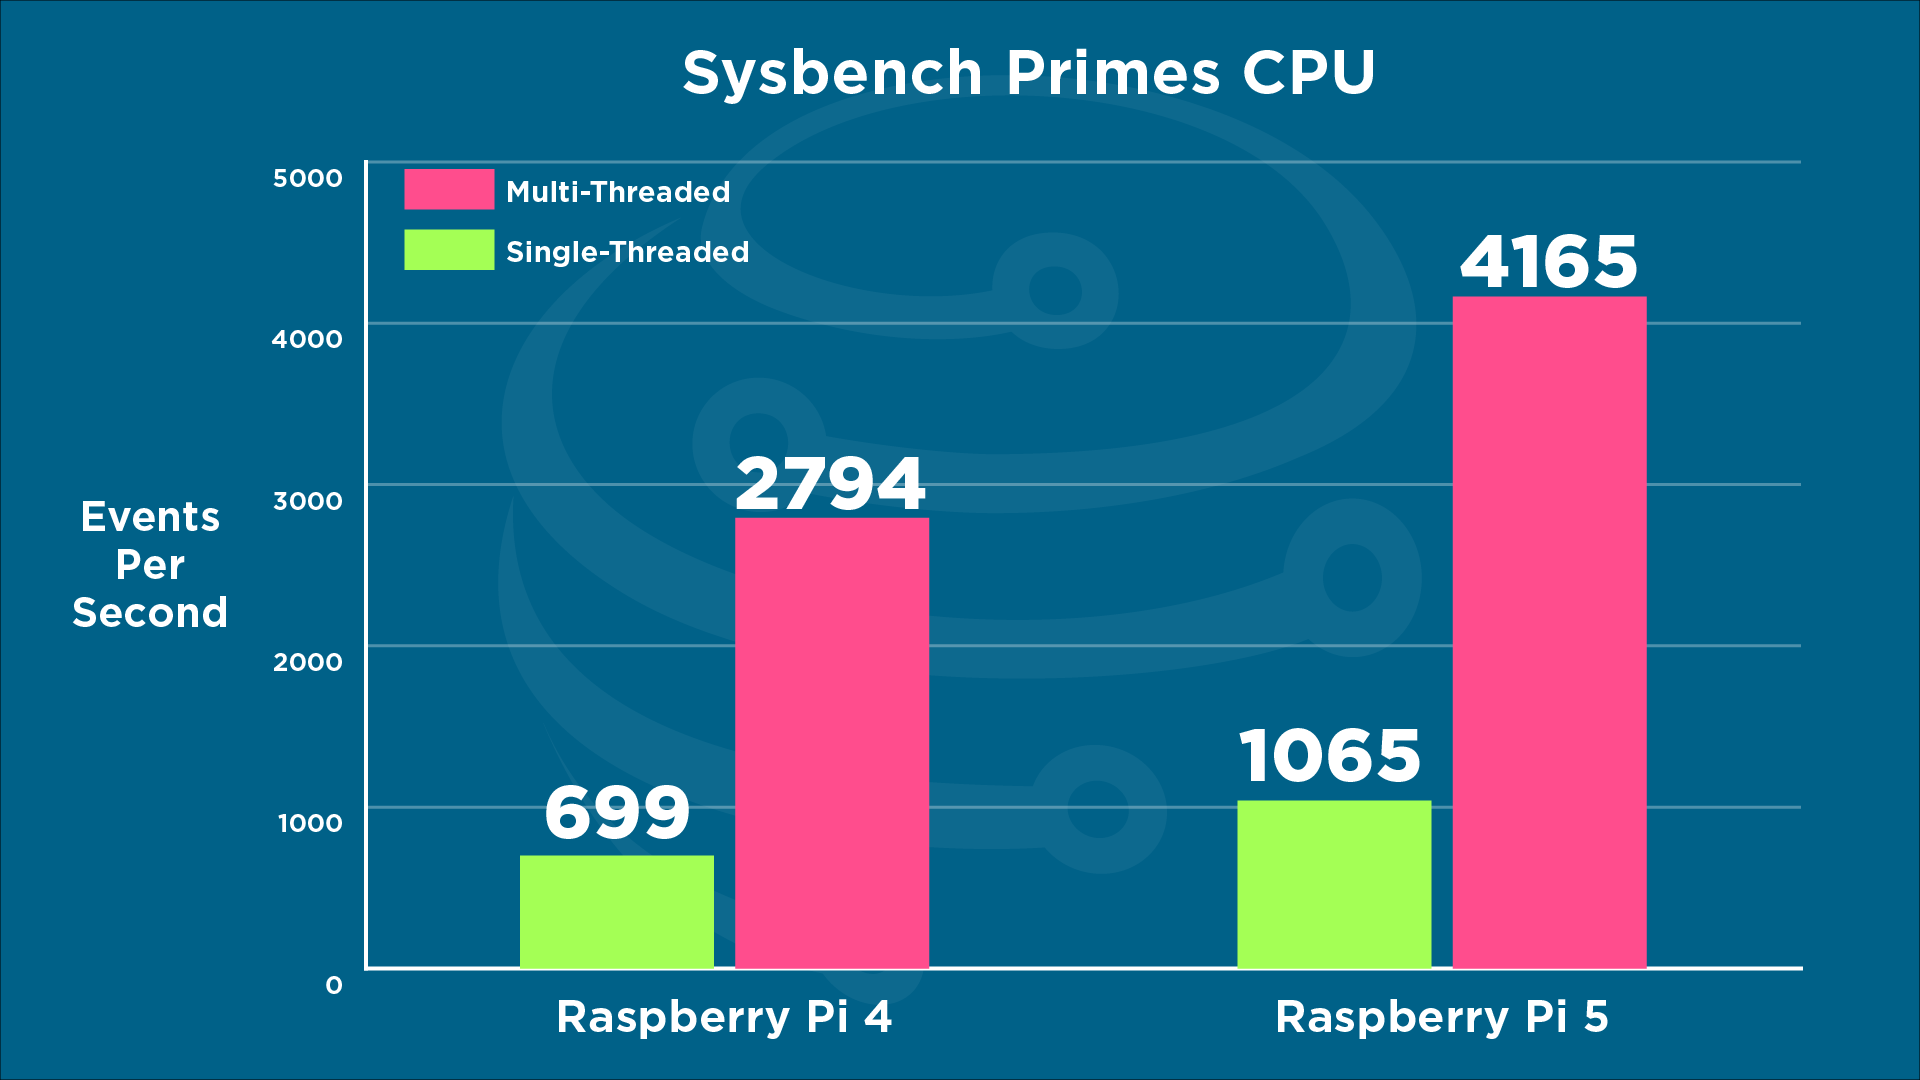
So I have officially gutted an ASIAIR PRO and replaced the internal board with a Raspberry Pi 5 with 8GB of RAM and the new Active Cooler. Based on the benchmarks from Core Electronics, the speed we are looking at is almost double from the RPi 4 to the Pi 5!
To get started I released a new OpenAstro 2.0 image for the RPi5. You will need the Raspberry Pi Imager client to flash the image.
What you need
Here is all the stuff I used to get this setup
- An ASIAIR Pro 2nd gen
- Raspberry Pi 5 board and Active Cooler
- Needle Nose Pliers / Dremel Tool / Metal File
- Windows PC / Raspberry Pi Imager / SD card / SD card readerCool
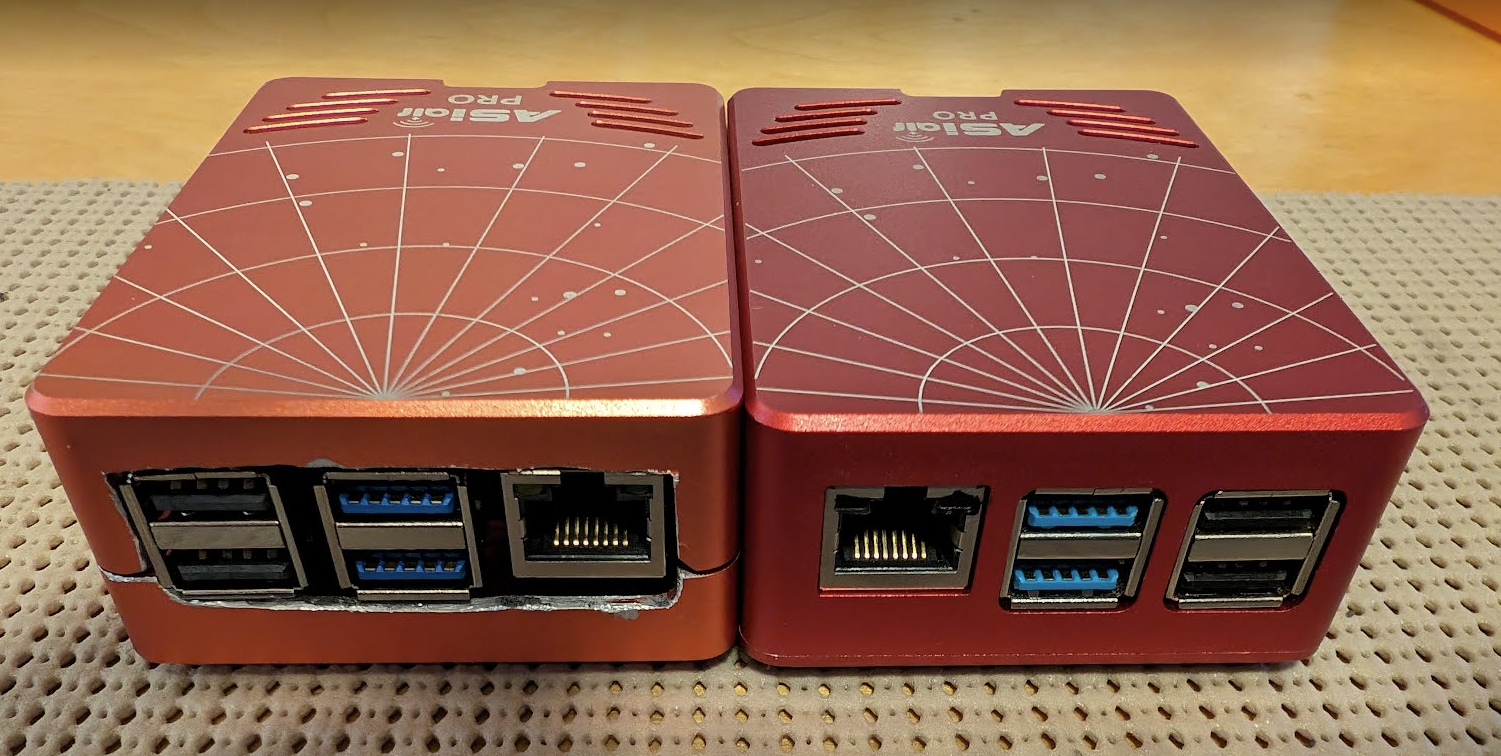
First I used the pliers to break off the internal brackets around the USB and network ports as the RPi 5 has the network, and USB ports in a different order than the RPi 4. I then used the Dremel and the file to even it out so the USB ports would fit properly, it’s not pretty but it works nonetheless. *NOTE The added fan and heat sync do not get in the way of the power ports at all!
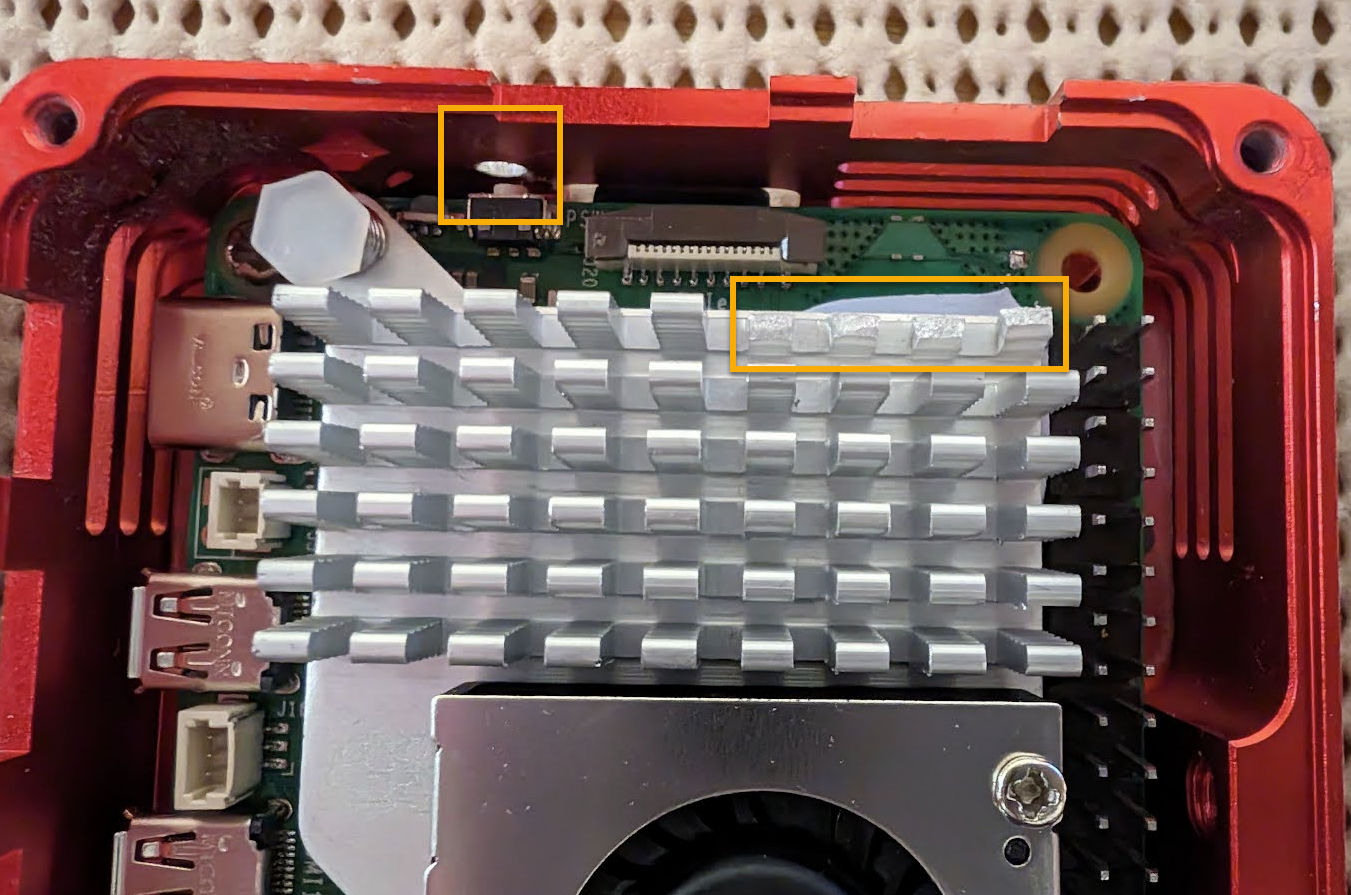
After getting the case modified I then installed the hardware I had to drill a hole where the new power button is to turn on the Rasberry Pi 5 (top yellow box) and also broke off 4 pins using the pliers on the heat sync (right yellow box).
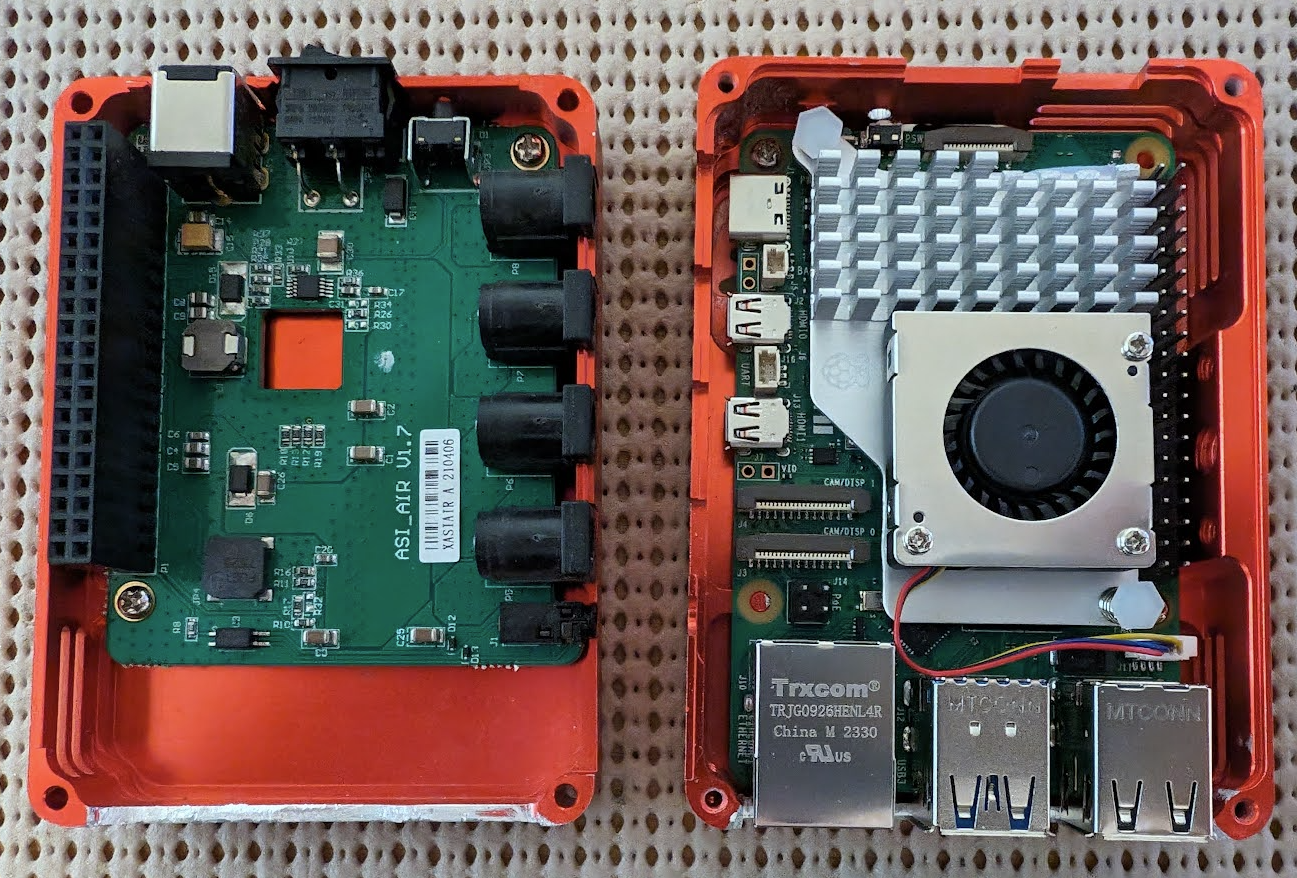
Once I completed that I put together the unit. The RPi 5 is on the left and the Stock ASIAIR Pro is on the right.
Installing the OS
The OS was simple. You just need to download the Raspberry Pi Imager https://www.raspberrypi.com/software/ and pick your flavor
Once it’s loaded you will want to go back and set the config.txt to support the power ports under the [all] line at the bottom of the config.txt.
[all]
#Enable 12v gpio output
gpio=12,13,26,18=op,dh,pu
You can remove any power ports that you don’t want. 12=port1, 13=port2, 26=port2, and 18=port4 under the [all] line at the bottom of the config.txt.
Example of only power ports 1 and 4 being active
[all]
#Enable 12v gpio output
gpio=12,18=op,dh,pu
Next, if you want to disable Wifi and Bluetooth you can add the following line as well. I did this as I only use the network port on the RPi5 with my MT3000! Simply add it under the [all] line at the bottom of the config.txt.
[all]
#Enable 12v gpio output
gpio=12,13,26,18=op,dh,pu
#Disable WiFi
dtoverlay=disable-wifi
#Disable Bluetooth
dtoverlay=disable-bt
The Verdict
So far I have been pleased with the RPi 5. I plan on releasing some more blogs showing the RPi running different operating systems and doing some Astrophotography with each one. It’s been screaming along and all the power ports work brilliantly!