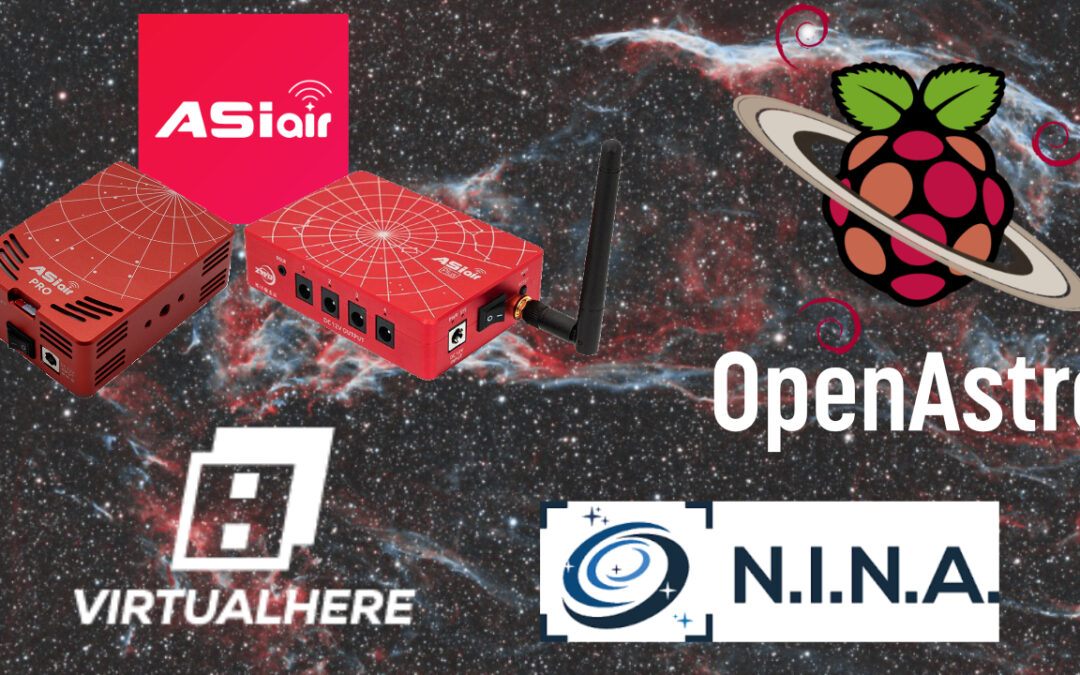
Yup, I am back at it again with another installment of the ASIAIR PRO & Plus RPi models supporting ASCOM. The first video I did I was able to get everything to work but it wasn’t perfect so I pulled the video. This time I have everything working. Mind you it’s not flawless as we are using a Raspberry Pi 1.5ghz Broadcom CPU and 4 GB of RAM so we are lacking processing power. Also, you will need to use the direct network port to your laptop or home network or WiFi-6 with the MT3000 to your laptop/pc from my previous post as the normal Raspberry Pi WiFi is not good enough for the throughput we need. What I will walk you through is the technical steps to back up your ASIAIR Plus and OpenAstro 2.0 which is based on Debian 11 Bullseye 64bit so we can take advantage of using all 4GB of RAM with VirtualHere and ASCOM.
As I have stated over and over again the ASIAIR Raspberry Pi that ZWO created is the only device you will ever need for astrophotography! You can use it with the following setups
- ZWO ASIAIR Stock – INDI (Proprietary Paid Solution and Proprietary ZWO equipment)
- INDIGO Sky – INDIGO (Open Source & Open Hardware)
- AstroBerry – INDI (Open Source & Open Hardware)
- Stellarmate – INDI (Proprietary Paid Solution & Open Hardware)
- OpenAstro 1.0 – INDI (Open Source & Open Hardware)
- OpenAstro 2.0 – Supports ALPACA (coming soon), ASCOM, INDI & INDIGO based on what you want to install (Open Source & Open Hardware)
So for Astrophotography, there are four main systems that can be used to drive your astrophotography setup.
ALPACA – ALPCA is the future of ASCOM and will be the migration away from ASCOM and will allow users to take advantage of ASCOM from Windows, Linux, and OSX
ASCOM – ASCOM is the general name for enabling technology based on universal connectivity between astronomy apps/programs and the devices they use.
INDI – INDI Library is an open-source software to control astronomical equipment. It is based on the Instrument Neutral Distributed Interface (INDI) protocol and acts as a bridge between software clients and hardware devices.
INDIGO – INDIGO is a system of standards and frameworks for multiplatform and distributed astronomy software development designed to scale with your needs.
OpenAstro & VirtualHere
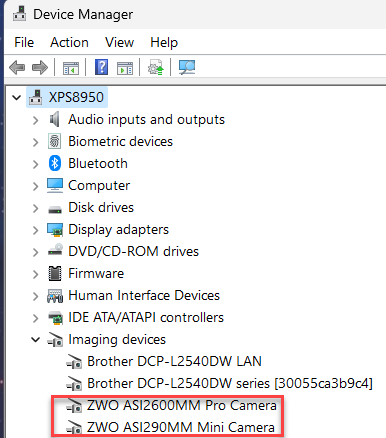
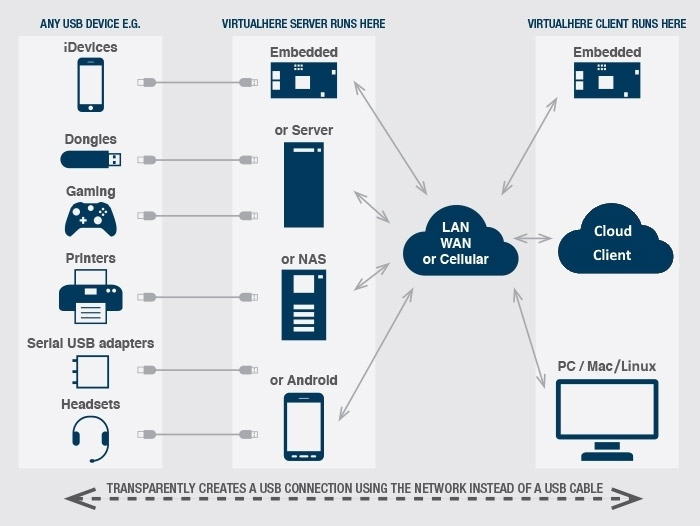
What is VirtualHere? To sum it up it’s a server that will run on the Raspberry Pi and then send whatever is connected to the USB port over the network port (stock WiFi is too slow on the RPi) to a client running on another computer (Windows, OSX or Linux). The VirtualHere Client then will treat those devices as actual devices plugged into the computer and they will also show up in the device manager as well for that computer you are using.

Breakdown of VirtualHere
Michael from VirtualHere is an absolute beast! He worked with me for over a month on resolving the issues I had using VirtualHere with the ASI2600MM and after all the work it’s finally paid off to a decent solution that allows you to load OpenAstro 2.0 and install VirtualHere so you can use whatever the heck app you want to use Nighttime Imaging ‘N’ Astronomy, SharpCap, or any other Windows application that tickles your fancy. At the time of posting this article, I have only used and tested N.I.N.A. with PHD2.
To get started I have a bunch of videos for your viewing pleasure but before we get started we need the following
- Linux PC – Used to backup the system
- Windows PC – ASCOM, Drivers, NINA, PHD2
- ASIAIR Plus Raspberry Pi
- Paper Clip
- Allen Wrench
- USB-C to USB 1 cable
- 12v power adapter
- Open Astro 2.0 Operating System https://www.openastro.net/
- VirtualHere license https://www.virtualhere.com/
- Patience 🙂
Based on the name of the videos this below section will be more information for each area.
Backup the ASIAIR Plus
To get started with the backup you will need to be running Linux. You will also need to install RPiBoot which can be downloaded here for Linux https://github.com/raspberrypi/usbboot. You are welcome to try Win32Disk Imager in Windows however the concern with that is the ASIAIR Plus has 6 partitions compared to 4 partitions of the ASIAIR PRO and I don’t believe it’s been tested and verified yet.
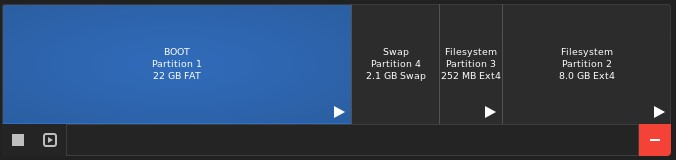
ASIAIR PRO Partition Table
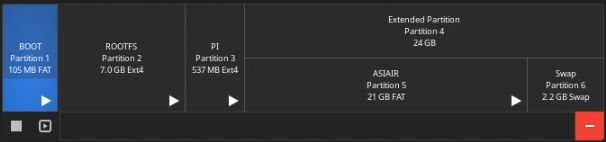
ASIAIR Plus Partition
Loading the ASIAIR Plus
In this video, you will need to download RPIBoot for Windows https://github.com/raspberrypi/usbboot/tree/master/win32 you will also need Raspberry Pi Imager https://www.raspberrypi.com/software/. Once you load OpenAstro 2.0 https://www.openastro.net/operating-systems/ you will then need to edit the config.txt in the boot partition on Windows and simply add the following lines of code for the power ports and save the file
#Enable 12v gpio output
gpio=12,13,26,18=op,dh,pu
You can remove any power ports that you don’t want. 12=port1, 13=port2, 26=port2, and 18=port4.
Example of only power ports 1 and 2 being active
#Enable 12v gpio output
gpio=12,13=op,dh,pu
After the first boot, you will need to log into the device using MobaXterm https://mobaxterm.mobatek.net/ and then update the OS
sudo apt update && sudo apt full-upgrade && sudo rebootSecond boot we need to install VirtualHere
curl https://raw.githubusercontent.com/virtualhere/script/main/install_server | sudo sh -s - vhusbdarm64a72Final Thoughts
As I have stated in the video this does work but it may not be an ideal solution due to the lack of CPU and RAM the PRO and Plus offer for the Raspberry Pi’s. I have kicked around adding a heatsink and fan for the CPU and trying to overlock from 1.5ghz to 2.0ghz to see if it improves everything. The problem is we are virtually handing off USB ports over the Network port and it uses a lot of bandwidth to do it properly. My next series is to get ALPACA to work and see if it works.