*UPDATED: 7/15/2023 – The update is a link to GitHub for the instructions. You can now build the Kernel Local or Cross-Compile very easily all with one download.
OK, so it’s time for another tutorial. To say I have been busy with my work life and personal life would be an understatement. However, if and when I can sneak in a few minutes I try and work on some projects I enjoy doing!
Today’s project is finally getting around to setting up Stellarmate OS on my ZWO ASIAIR Plus Raspberry Pi version. What I am using is the following
- Windows PC (You can use Mac, Linux, or whatever but for ease of use I am doing Windows in this tutorial)
- ZWO ASIAIR Plus (Raspberry Pi Version)
- My iOptron power adapter for my mount (5v power for ASIAIR Plus)
- A paper clip
- USB Type-C to USB-A 2.0 Male cable
- Network Cable
- A PC with a Wi-Fi connection
- RPiBoot https://github.com/raspberrypi/usbboot/blob/master/win32/rpiboot_setup.exe
- Raspberry Pi Imager https://www.raspberrypi.com/software/
Big thanks to @Vilen Sharifov for sharing this little hack so you don’t need to use the Raspberry Pi I/O Board! So here is a quick video on loading up the Stellarmare OS
Ok so now that I have the OS installed which took like 40+ minutes I was able to boot up the board and got connected via Wi-Fi on my PC and also connected my ASI290MM Mini and a network cable so I could update the board following these instructions
Once it’s loaded turn it off and turn it back on and then make changes to the config.txt by adding the following line into the config.txt on the /boot partition
otg_mode=1NOTE: Once done with the installation move the ASIAIR back into the ZWO case at this point. I was running the kernel upgrade and the temp was 183.2 °F I moved it back into the ZWO case while still compiling and it’s 158.18 °F.
Once the board is back in the case we can boot up the system and follow the instructions
https://www.stellarmate.com/support.html?view=kb&kbartid=15#4_connecting_to_stellarmate
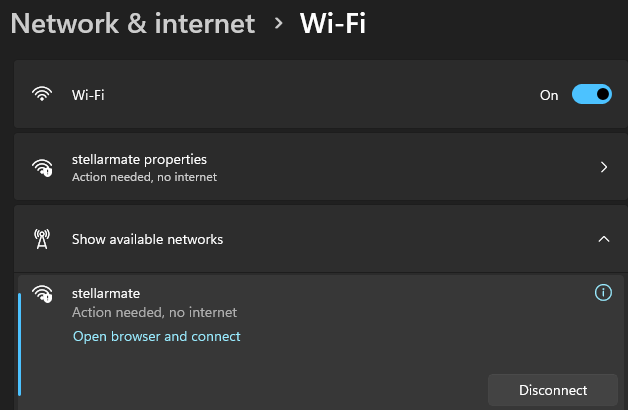
After connecting to Wi-Fi you click this web page to get to the VNC
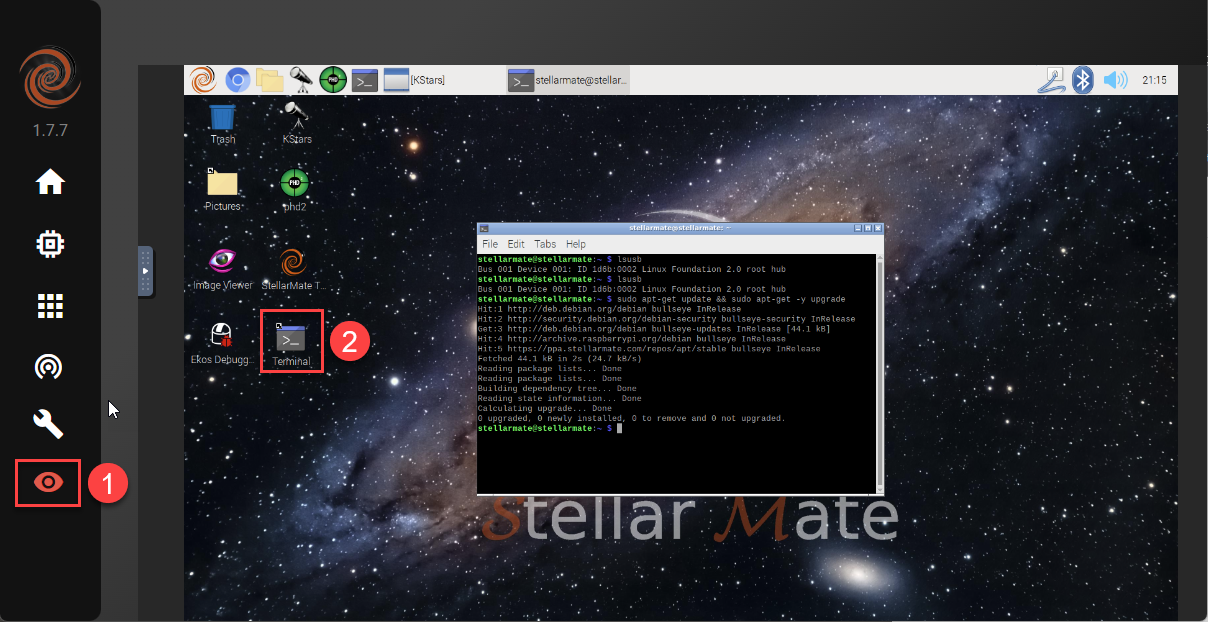
Once connected via the Web Portal I then updated the OS with Terminal
sudo apt-get update && sudo apt-get -y dist-upgradeAfter the update, I rebooted Stellarmate OS and now I am fully upgraded. However, the USB is not working at all

Fixing the Drivers
So in my last tutorial, I wrote up how to build the kernel and copy everything over to the system when building from another computer for 32bit OS
That is quick and but it also adds a lot of complexity as you copy over the kernel from the PC to the Raspberry Pi. So today we are going to download the Kernel code and compile it all on the ZWO Raspberry Pi so it’s easier for users but going to take a lot longer to do.
I have created a custom Kernel that works with Stellarmate and the instructions can be followed for both 32bit and 64bit operating systems.
https://github.com/open-astro/linux/wiki/Building-the-Kernel-Locally
Once everything is run and you reboot, we should have a working Stellarmate on the ASIAIR Plus using the 64-bit image and USB Ports!

Configuring the Power
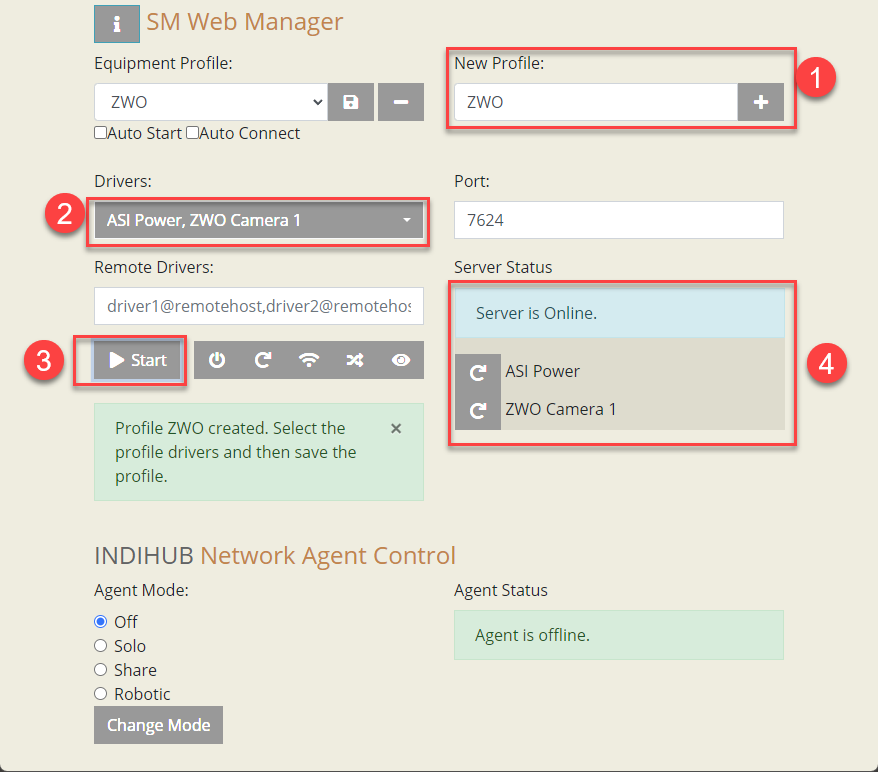
Power works perfectly when loading Stellarmate. To get the power to work you need to configure the SM Web Manager via the following link http://10.250.250.1:8624/. Once you get connected set up a new profile and then configure the drivers to be ASI Power and the rest of your gear. In this example, I added just the power and my camera to verify the power ports work. Once you follow steps 1, 2, 3 by pushing start it will show the server is Online and ready to go in example 4
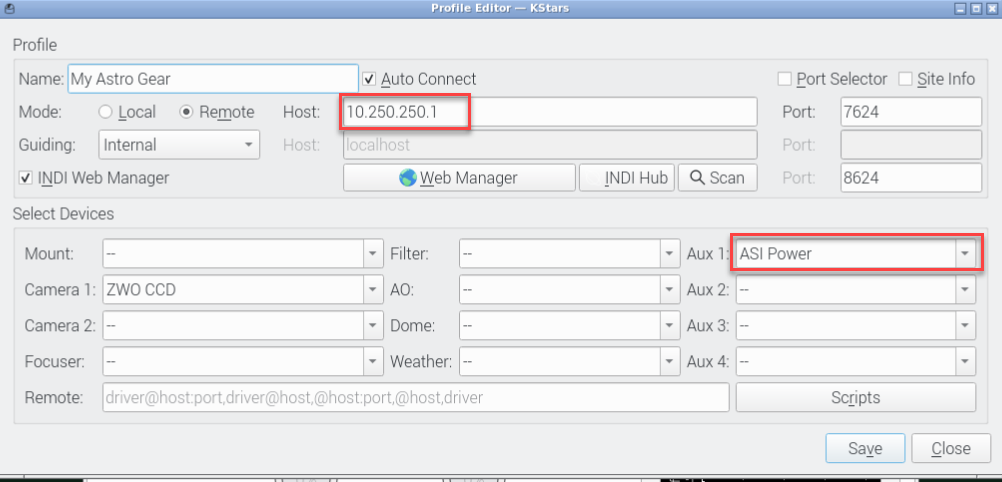
Now you want to go back to the main IP and go back to VNC and configure Ekos for all your drivers and the ASIAIR Power and also the IP Address as well and click save
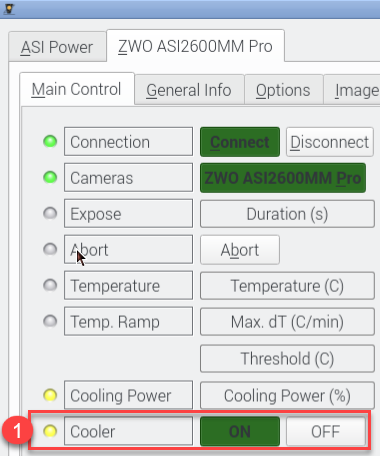
Next back on the Ekos screen and click start to start the drivers

Once the driver starts you will need to do the following
1. Choose the Device
2. Set the power level
3. Turn on the power
4. The logs should show it’s good

With the power turned on, we need to go to the camera and turn on the fan
At this point, we are ready to image. If you are new to using StellarMate make sure to go through their amazing instructions to get imaging the stars.
I hope this was helpful and wish you clear skies! Till next time…