So I have been trying to shoot M33 for a while as it’s such a beautiful galaxy. In late October I went out and set up my EQM-35 mount, polar aligned, and then typed in M33 into the keypad and the telescope slewed into position. I took my test shots with my Bahtinov mask and all looked good to go, so I shot for two hours. When it was all said and done there was no M33 in my pictures? So I went out again on November 4th set up my EQM-35 mount, polar aligned, and then typed in M33 into the keypad and the telescope slewed into position. I took my test shots with my Bahtinov mask and all looked good to go, so I shot for two hours. When it was all said and done there was no M33 in my pictures?
So before we have another GroundHog Day I decided to reach out to my favorite forum CloudyNights to see what in the world was going on. I posted my image and asked the forum and they responded. For whatever reason, my EQM-35 is not aligning exactly where I need it, I could be off on my location settings, date and time, or something else. The simple solution is to plate-solve, which means I take a picture of my current location and load it up in PS2 and it will plate-solve my location so I know where in the hell…I mean wherein the dark sky I am. Well instead of installing another app on my laptop I went in the complete opposite direction. Since I am tired of running my PC as it adds to the complexity of my setup I decided to pop for the ZWO ASIPro Kit. What the whole kit brings to my setup is the following bullet points
- I don’t need a laptop anymore which means no more surge protector, tabletop, and a plastic bin to keep the laptop out if the elements
- Now I can guide on stars so I can take up to 5-minute exposures instead of 15-40 seconds which means better pictures and fewer sub-exposures saving my camera
- Full control of my EQM-35 with the ASIAir Pro through the Apple IOS application
- I can now plate-solve and go anywhere in the sky without getting lost
- I can stay in the warmth of my home and still shoot amazing pictures from outside in the winter months
- It also includes a 64GB USB thumb drive to save all my pictures
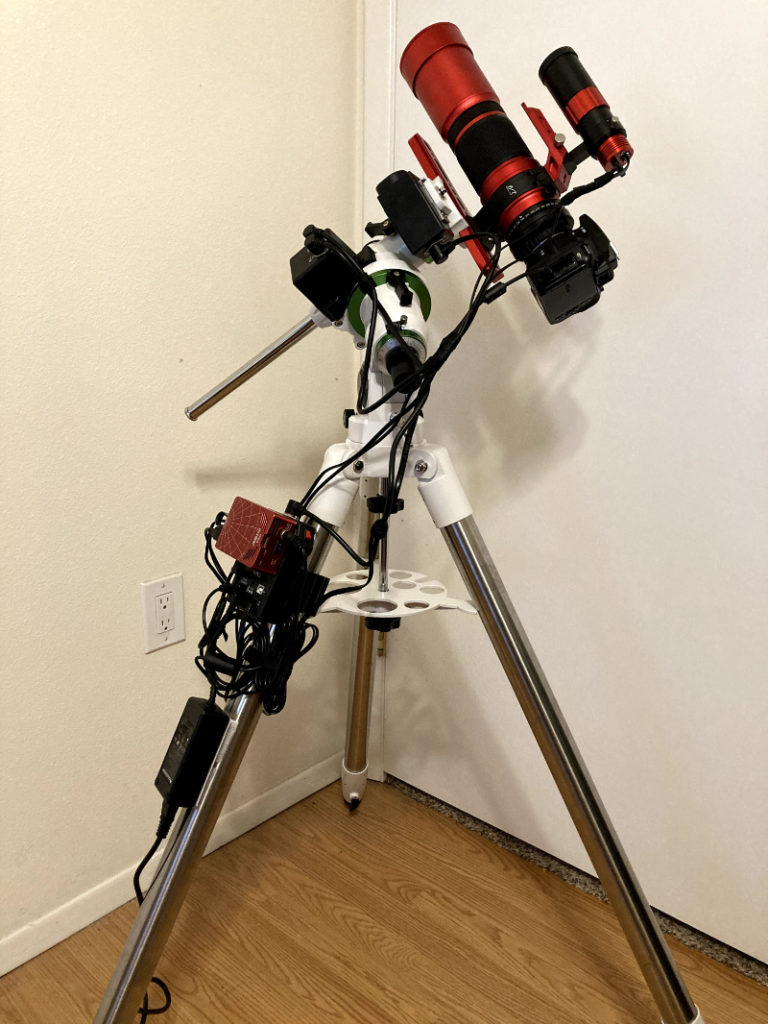
To me, it’s a win and it’s why I made the investment to the ASIAir Pro. So when it first arrived I set up everything on the mount with velcro and velcro wrap ties.

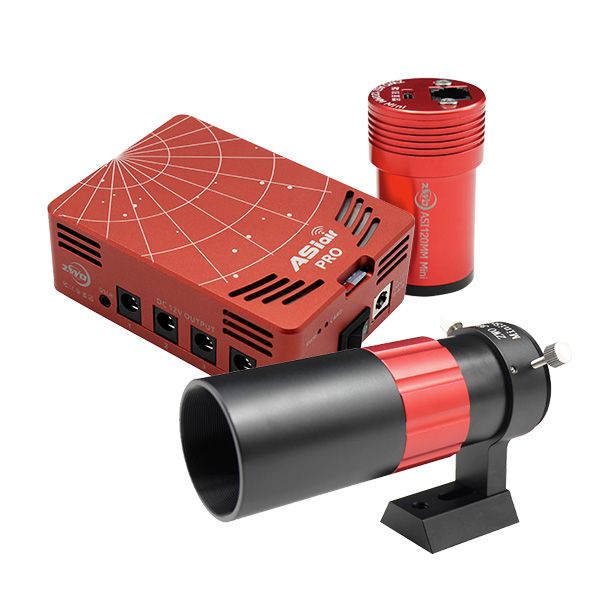
Here are all the new pieces of hardware I added
- ZWO 30 mm f/4 Mini Guide Scope
- ZWO ASI120MM Mini Monochrome CMOS Camera
- ZWO ASIAir Pro Wireless Imaging Controller
- William Optics Cat Series Saddle Handle Bar – RedCat
- Eqmod USB Console Cable
Once everything was secured I tested the rotation of the telescope making sure there enough slack for everything to rotate in all directions. When that was completed I did the next most important thing and backed up the internal SD card which holds the operating system and licenses for the ASIAir Pro. Here is a great link to get you all backed up for Windows or Mac. Once I got everything backed up I inserted the SDCard and powered on the ASIAir Pro. When it boots up it makes a loud beep to let you know it’s online. At that point, I then turned on the mount and my camera which is hooked up via a USB cable and launched my iPad, and connected to the Wi-Fi network ASIAR with password 1234678. After I connected to the ASIAir I launched the ASIAir IOS application.
Inside the app, it sent the newest firmware from the iPad application right to the unit (sweet) and then rebooted the ASIAir Pro. After it came up the second time I set up the config based on my current setup and got it connected to my Wi-Fi. Now it’s just time to shoot…Well, sadly due to bad weather I was not able to use the new setup so I had to wait till Tuesday the 10th before I could take the mount out. Once I was set up on Tuesday I had issues with the software and Wi-Fi connecting as when the mount gets cold it seems to limit how far the Wi-Fi can connect even on 2.4Ghz. Also just a note my Wi-Fi is on one side of the house and the mount is on the other so I probably need a Wi-Fi extender. I troubleshoot the setup on Wednesday the 11th and I was able to go back out to shoot but then ran into issues with guiding. Finally, on Thursday after watching some videos I was able to shoot, however, I still ran into issues with the camera, the mount, and guiding but was able to work through all the issues. Here is a YouTube video I posted with a whole start to finish using the ASIAir Pro to processing pictures with PixInsight and everything in between. There is also a table of contents so you can jump around in the video
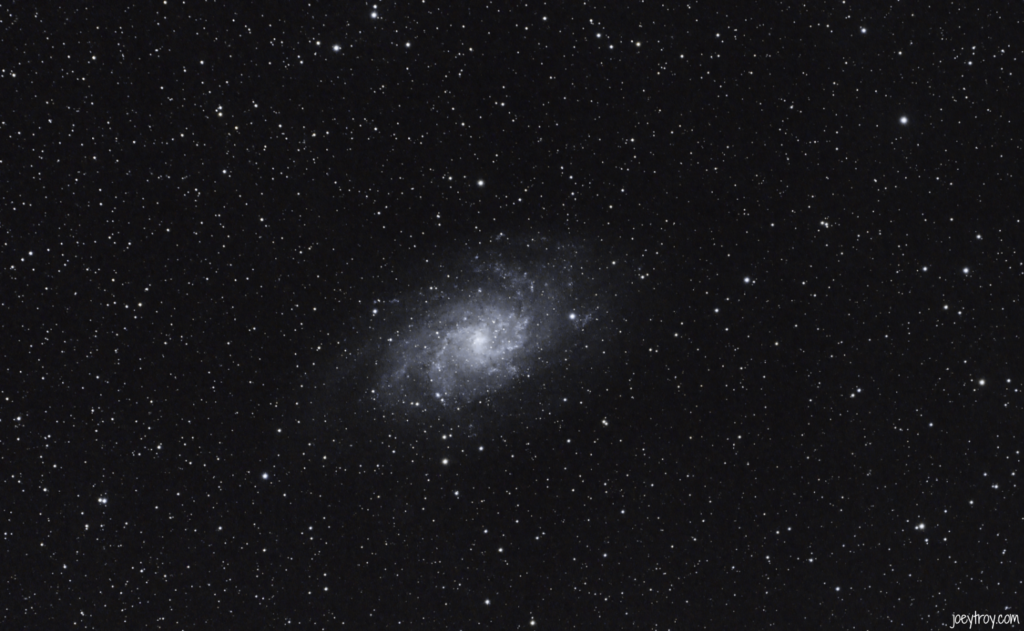
After it was all said and done here is the final image of M33
Till next time…