Time for another tutorial. This time I am using one device to rule them all! We are going to load INDIGO Sky 64bit so we can take advantage of all the RAM on the ASIAIR PRO and be able to use INDIGO, INDI & ASCOM all from the nice small device of the ASIAIR PRO. The goal of this little project is to show how versatile the ASIAIR PRO is and how little energy it expends so you can capture the skies for longer in the field. I used a KILL A WATT to test the power usage of the ASIAIR and also compared it to an i5 NUC just for reference.
NOTE*** Port 1 of the power ports will not work you will only be able to use ports 2, 3, and 4 this is a limitation of INDIGO but IMHO not many users will need all 4 power ports.
So the main reason I love the ASIAIR PRO is simple. It has everything you need USB, Wi-Fi, Ethernet, and of course 4x5v power ports to power all you’re Astro equipment in a little tiny unit that fits in the palm of your hand. Also, you can easily reload the software on a MicroSD card and use whatever flavor of Linux you want on it. While the ASIAIR software that ZWO is some amazing software you are locked into using either a Canon, Nikon, or Sony DSLR/Mirrorless camera, and if you want to do more like multi-star guiding, filter wheels, or an auto focuser you need to buy only supported ZWO cameras and equipment. For me, that is just fine however for others out there that love QHY, Celestron, or whatever Astro gear is out on the market it’s not going to work for them. So this is the reason for silly projects like this as I like to help out the Astro community and really push the limits of the ASIAIR PRO.
What we need to get started, you can substitute Windows for Mac or Linux I just wrote this for Windows.
- Internet Access with a Router
- ZWO ASIAIR PRO (Raspberry Pi Version)
- Computer running Windows with Wi-Fi
- A 5v power adapter for the ASIAIR PRO (I am using my iOptron HEM27 Power Adapter)
- Spare 32GB SD Card to load INDIGO Sky
- Network Cable to your Router
- Windows Raspberry Pi Imager https://www.raspberrypi.com/software/
- Download the Indigo Sky 64bit Image from https://www.indigo-astronomy.org/indigo-sky.html
- Other software will be needed as we complete the tutorial
Installing INDIGO Sky
Here are some instructions on using the Raspberry Pi Imager software
Booting INDIGO Sky
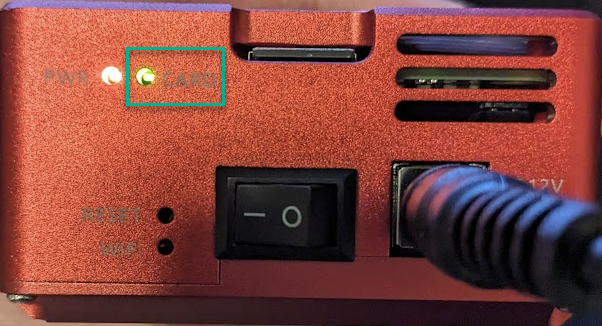
Once you have the ASIAIR PRO reloaded with Indigo Sky 64bit we will connect the Network Cable to the ASIAIR PRO and turn on the unit. Once the unit is done booting up the green card light stops blinking the unit is ready.
Finding and connecting to INDIGO Sky through the Network Cable
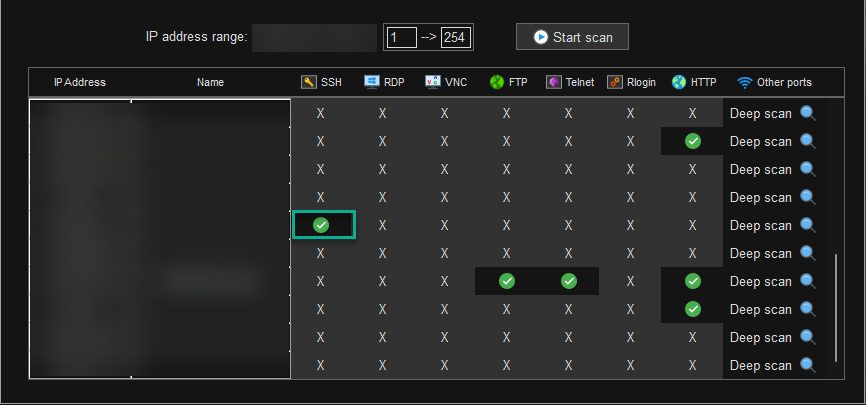
At this point you want to download MobaXterm this is by far one of my favorite apps for SSH, RDP, FTP, SFTP, or whatever you need. Once installed we are going to open the app and then Tools < Network scan. Once up put your IP address scheme i.e. 192.168.1.x or 10.x.x.x or whatever it is. If you are not sure you can always open the Windows command prompt and type in
ipconfig /allOnce you have the IP address range listed you can click Start Scan and it will search your network for all devices on your network and open ports. We are looking for the IP Address of ASIAIR PRO which will be active on the SSH shown in green.
Once you have the IP written down we will then connect to the ASIAIR PRO via MobaXterm using SSH. Simply click the Session icon and input the IP Address of your ASIAIR PRO in the Remote host click on the Specify username and type in indigo and click OK

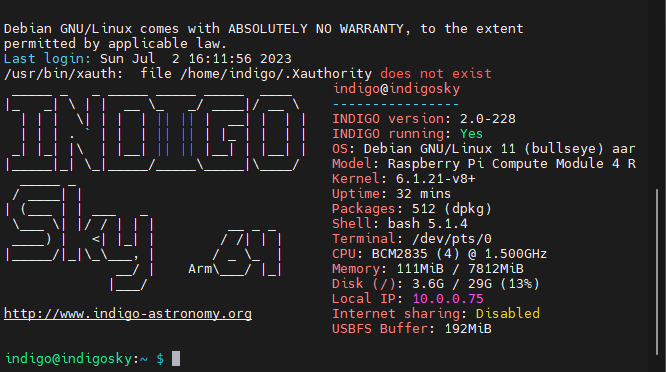
At this point, you can click click on the session and type in the password indigo to get connected and you should see the following screen if it all works properly
Updating the ASIAIR PRO
First things first let’s update the ASAIR. We simply need to run the following command into the SSH terminal
sudo apt update
sudo apt full-upgrade
sudo reboot
As of this writing, this will update the AISAIR PRO to INDIGO version 2.0-240.
Installing VirtualHere Server
VirtualHere https://www.virtualhere.com/ is going to set you back USD 49 but is well worth it if you want to use ASCOM software from a PC. VirtualHere is a server that sends a USB port over Ethernet or Wi-Fi. What that means is you connect any camera or Astro device to the ASAIR PRO you can use VirtualHere on your PC to use that device. What is even better is the VirtualHere client can be installed on Windows OSX or Linux so the sky is the limit on the types of software you can use be it ASCOM or INDI or whatever.
OK let’s install the server that is 64bit and specific to the ASIAIR PRO hardware
curl https://raw.githubusercontent.com/virtualhere/script/main/install_server | sudo sh -s - vhusbdarm64a72VirtualHere Speed Tests using ASCOM and ASI Stuido for Planetary
**NOTE: While connecting to the ASIAIR PRO over Wi-Fi with VirtualHere will work it may not be recommended depending on what you are doing. In testing Wi-Fi it can not handle the speed of the ASI662MC for Planetary Imaging and you will need to use Ethernet.
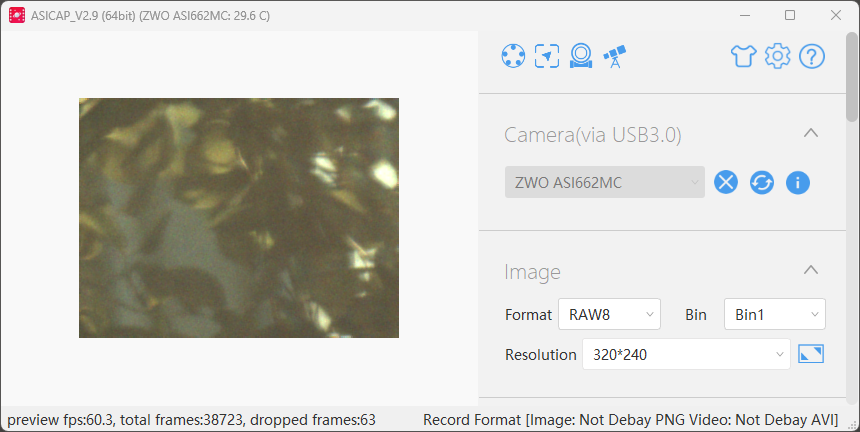
Using Wi-Fi on ASIAIR PRO
I was able to capture at RAW8 @ 320*420 at 60.3fps but was dropping frames. I could not increase the resolution as it’s just too much data over Wi-Fi. During the test with the ASIAIR PRO and the ASI462MC, I was using 10-13 AMPS of power.
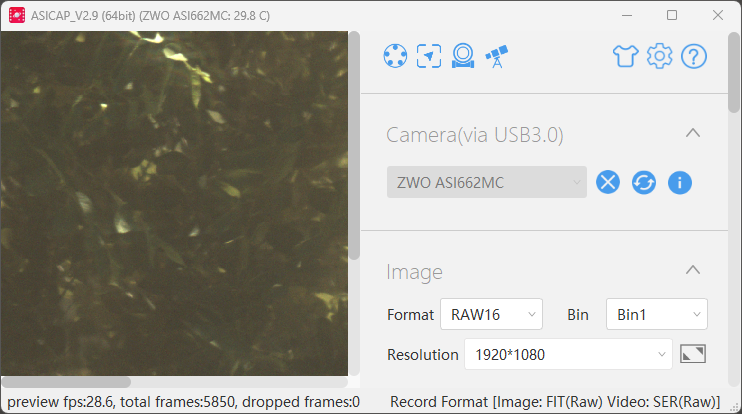
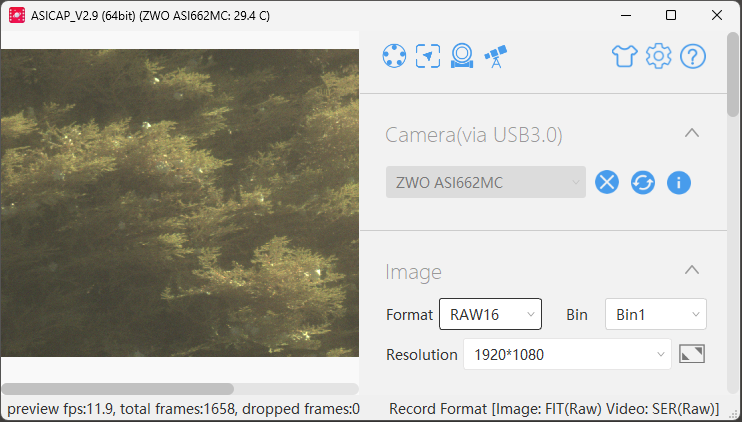
Using Ethernet on ASIAIR PRO
With ethernet it’s no problem at all, I was able to run RAW16 @ 1920*180 at 28.6fps and 12-14 AMPS of power.
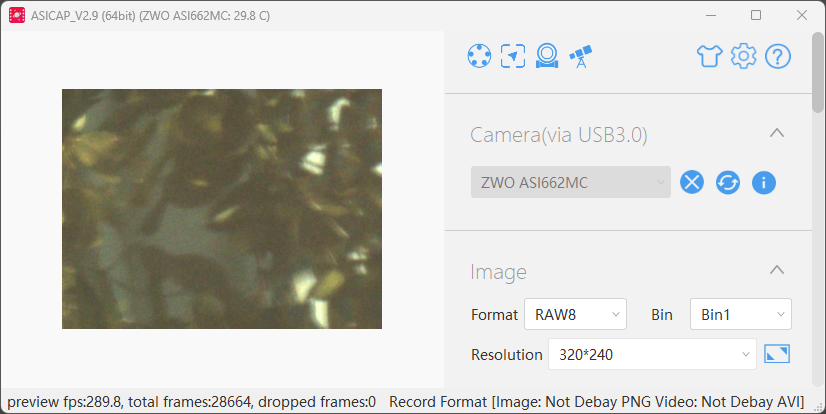
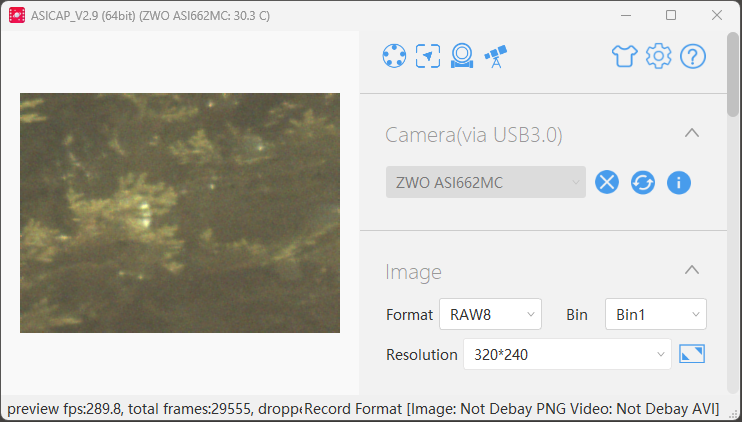
And at RAW8 @ 320*240 I was screaming between 289-290.3fps and using 9-12 AMPS of power.
Using Wi-Fi on GMK NucBox2 Intel Core i5-8279U
So while this is about the ASIAIR PRO I wanted to compare using VirtualHere on a NUC. I was able to do RAW16 @ 1920×1080 at 11.9fps. During the test I was using 29-54 AMPS of power however if I RDPed into the NUC I jumped to 72-86 AMPS of power by just clicking around and launching applications. I bring this up as for users that are using a NUC it may be worth your while to use VirtualHere to push your battery usage in the field as it will use much less energy.
Using Ethernet on GMK NucBox2 Intel Core i5-8279U
Here are the numbers using RAW16 @ 1920×1080/11.9FPS using 43-56 AMPS and RAW8 @ 320×240/289.9FPS using 23-31 AMPS.

Turning on the ASIAIR PRO Port Ports
So let’s talk about those power ports. Since we are using INDIGO we need to set up the ports from the web interface. To connect to INDIGO we are going to use the Wi-Fi instead of the Ethernet.
NOTE*** Port 1 of the power ports will not work you will only be able to use ports 2, 3, and 4 this is a limitation of INDIGO but IMHO not many users will need all 4 power ports.
I have some detailed instructions I wrote on setting up the power ports via GitHub and also connecting to INDIGO via Wi-Fi
INDIGO Sky access point has the following default credentials:
SSID: indigosky
password: indigosky
https://github.com/open-astro/INDIGOSky/blob/main/INDIGOSkyASIAIRPro.pdf
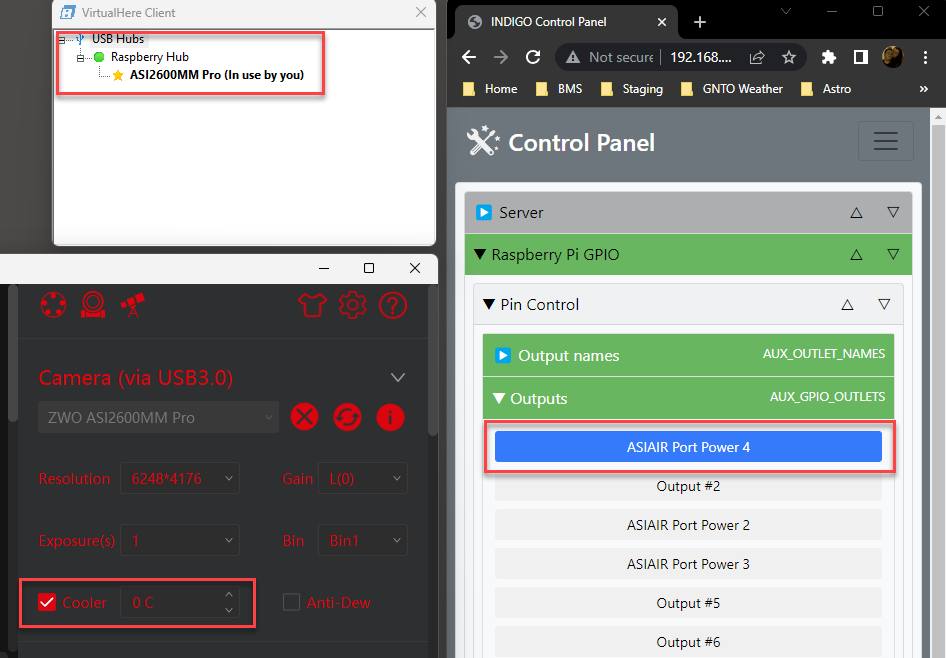
Once the ports are working you simply can turn on a port and use the cooler through the software. Here is an example I did with ASI Studio with VirtualHere and using power port 4.
Using INDIGO Sky
So I am not going to go into full detail about using INDIGO but if you want to use it, it’s a super lightweight Astro imaging system and it supports so much stuff and is simply an incredible piece of Astro software. You can use it from a tablet or phone to use the Web Interface, There is an INDIGO Control Panel which you can install on Windows, OSX, or Linux to control INDIGO Sky on the ASIAIR PRO. And finally, there is a desktop environment you can install onto the ASIAIR PRO and use VNC to control INDIGO Sky. More details and documentation is on the main page https://www.indigo-astronomy.org/indigo-sky.html
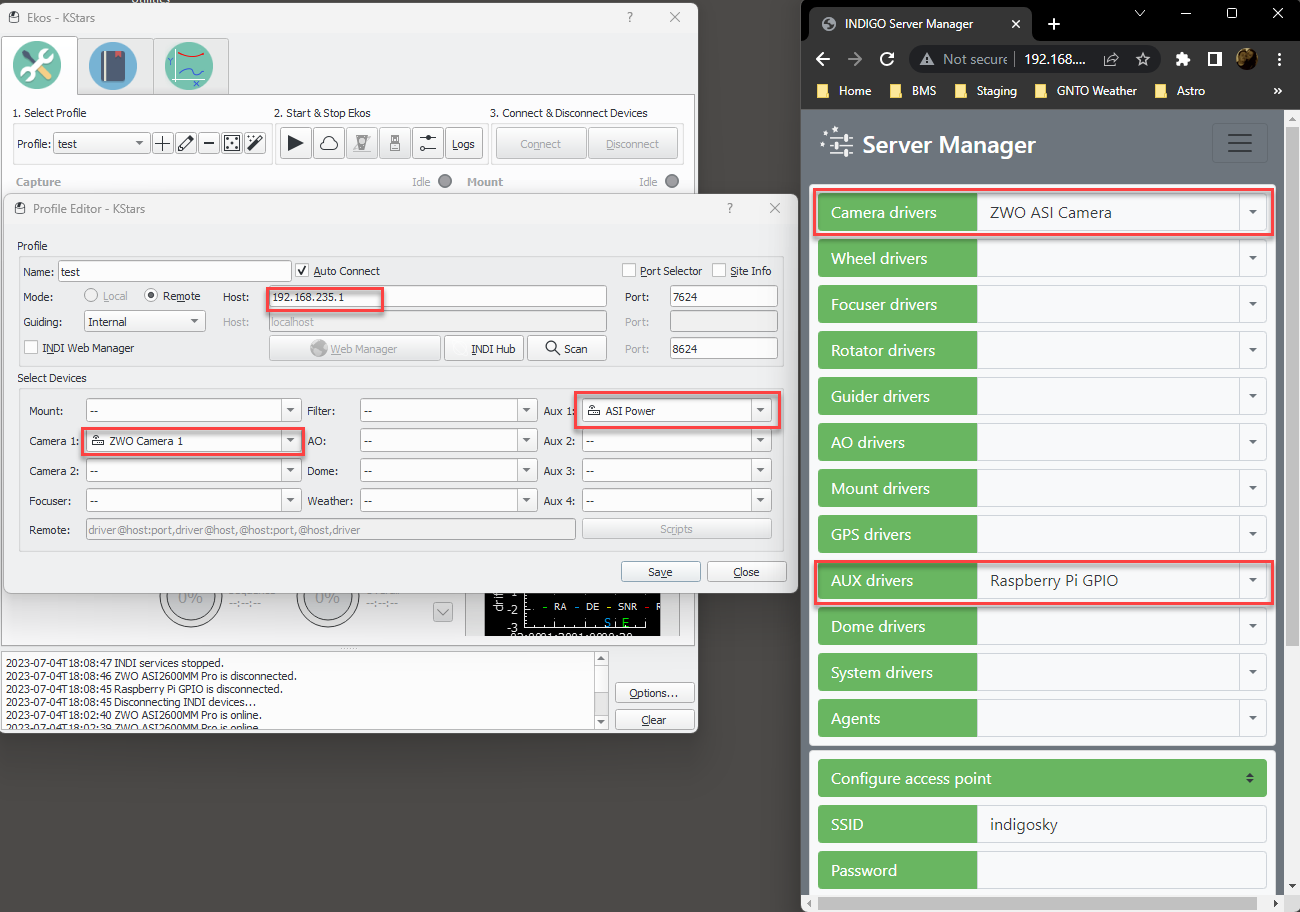
Using INDI with INDIGO Sky
So you want to use INDI apps like KStars and Ekos or other INDI applications, well you can connect directly to INDIGO with INDI apps all you need to do is turn on your drivers in INDIGO, and then configure your drivers in Ekos, and you will be up and running.
Well, I hope this article will be helpful for some. Again this was just a fun little tutorial of what you can do with the ASIAIR PRO. Till next time…